Any neophyte podcaster can get overwhelmed with the bulk of information available online. From tips on how to properly record your podcast to recommended equipment you can use. Oftentimes, you’d end up asking more questions than getting the answers you are looking for.
However, don’t lose hope just yet because we’ve got you covered. Below is a general checklist for podcast recording that can help get your efforts off to a good start:
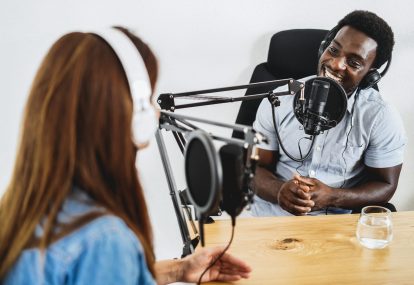
Start with good audio
Even if you have a DIY setup, it does not mean you cannot achieve that professional-sounding podcast you want. The trick to achieving better audio always starts with two basic considerations: a good microphone and a decent recording area.
There is an array of choices when it comes to mics. If your budget allows you to go for the high-end ones, then by all means go for it. However, there are good ones out there that don’t necessarily cost a fortune.
Always take into account your needs before committing yourself to buying a particular type of microphone. For example, dynamic mics (e.g ATR 2100) don’t require external power and are good at picking up a limited range of audio with its usually compact design. Condenser mics, on the other hand, usually need power from an external source and are known to provide richer and fuller tones. There are other components like compressor, mixer, and interface that you may find handy as you go but they are not required.
When choosing a microphone, the location where you record matters a lot. A condenser mic may be richer in tone but it captures noise easily That being said, it would be best to have a treated room or at least truly silent place to record. Other than that, dynamic mic would do fine.
Since we’re talking about it, your foremost consideration about your recording area should be the presence of ambient noises. Make sure that the room where you are going to record has some decent soundproofing. Especially if you have a powerful mic, ambient noises from a poorly soundproofed room may be picked up during recording and could mess your whole take altogether. Most DIY setups use the egg tray trick in soundproofing: simply paste egg trays on the walls, cover them with a thin sheet of plywood and voila! You’ve got yourself a soundproofed recording area–-DIY style.
Editing
After the painstaking recording, next comes the editing process. Similar to actual recording, post-processing also spells the difference between a good podcast and a sucky one. In this stage, you have the chance to eliminate mistakes on your recorded files. You can also embellish the tracks by adding some background music.
There are lots of free editing programs that most podcasters go for. Audacity, as being one of them, offers multi-track mixing, numerous effects, and additional audio elements such as intro sounds, music, and more. If you are willing to shell out a few extra bucks for a recording software, Adobe Audition promises to deliver a total editing experience with its extensive features and capabilities. For $49/month as part of the CreativeCloud or $20 individually, you can try the go-to software in the audio world.
Another popular software among podcaster is GarageBand. Initially having features specifically tailored for podcasters, GarageBand was once synonymous with podcasting. Garageband works on Apple OS X and iOS.
But why waste your time paying, learning, and editing your shows when you can hire a professional? This will not only help you save time but it will also allow you to focus on the important aspects like growing your podcast and business.
You can add gear as you go but for now, these are the most basic considerations in terms of recording. Happy podcasting!
Share this post!
Related Articles

Tips on How to Become a Great Podcast Host
How to Get Invited to a Podcast

Why It Pays To Be a Podcast Guest
